Retrofitting


 01-28-2012 | 09:51 PM
#36
Registered User
Joined: Jan 2011
Posts: 1,279
From: CA
Car Info: "Shadow"
Yup, foglights are useless with HID's cuz they're already ****ing hella bright & beam out hella wide, just for looks only imho. Plus, everyone with foglights always run them with no damn fog around, i guess more lights up front=cool on the street lol! Glad i ain't got 'em, just more ****ing bulbs to worry about plus the 06 fogs are too small for my tastes. I have the foglight covers for better looks & intake function (cold air ram homemade) since the STi foglight covers are way too plain!
01-30-2012 | 10:16 AM
#38
Here's my write-up:
Alright here we go,
Materials:
I ordered the Morimoto Mini H1 with mini gatling shrouds.
Make sure you have a ton of latex gloves for handling everything, and some thicker gloves for pulling out the headlights from the oven.
It would also be beneficial to order some RTV clear silicone, it's about $4. And if you decide to, I strongly suggest painting the reflectors black with Rustoleom Painter's Touch satin black spray paint (2x the coat!).
Lastly and most importantly, you'll need a Dremel with cutting wheels.
Other tools:
8mm wrench for adjusting the leveling at the end
10mm to take off the headlights
various pliers
a thin small flat head and medium flat head for separating the headlights
a medium and small phillips head
a knife to help cut the sealant while separating the headlights
plastic baggies to put bulbs and screws in
Remove headlights:
You'll need to unclip your grill and remove it. Remove a few clips to the bumper so you can pull it back slide your headlight out. There are 3 10mm bolts holding down the headlight. Your pliers will also be useful in disconnecting all of the harnesses.
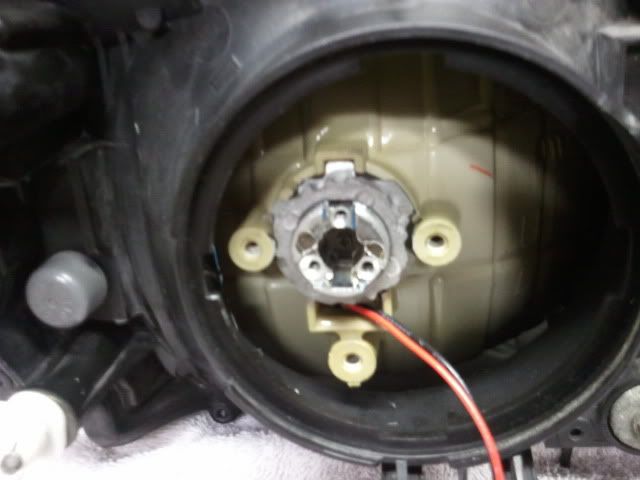
Disassemble headlights:
Remove all of the bulbs and place in plastic bag. remove the white bracket on the side, 2 phillips screws, then there are 8 black tiny screws on the edges of the headlight, use your small phillips. Use your medium phillips to remove the bulb holder clip. You won't be needing it anymore, so if yours is still in tact you can sell it pretty easily.
Marking up the adapter washer:
This should be done before you bake the headlights so that you can use your dremel to cut up this adapter washer while you wait for your painted reflectors to dry. The Morimoto kit comes with various items, there's a flat washer with a notch on top, that is what you'll be marking up with a washer. You'll need to make the top notch narrower, round the sides at the 3 and 9 o'clock positions, make a notch in the upper left corner at about 10 o'clock, and two round notched at the 4-5 and 7-8 o'clock areas.
Here is one person's example, I would personally cut more so that you have room to play later when adjusting the horizontal leveling:

Baking headlights:
My oven sucks so I preheated it to 250, put in one headlight for 15-20 minutes. Use your small flat head and knife to peel away the lens from the housing, cut at the sealant while you do so, you can use the medium flat head for more leverage if needed. If you are having difficult, put it back in the oven for 5-10 min. Once separated, you can remove the chrome bulb cover piece inside.
Painting headlights:
I just used aluminium foil to mask off everything except the low beam reflector. Make sure the surface is clean. I sprayed one coat, waited 20 min, sprayed another coat, waited 20 min. While you wait for the paint to dry, you can work on modifying the adapter.

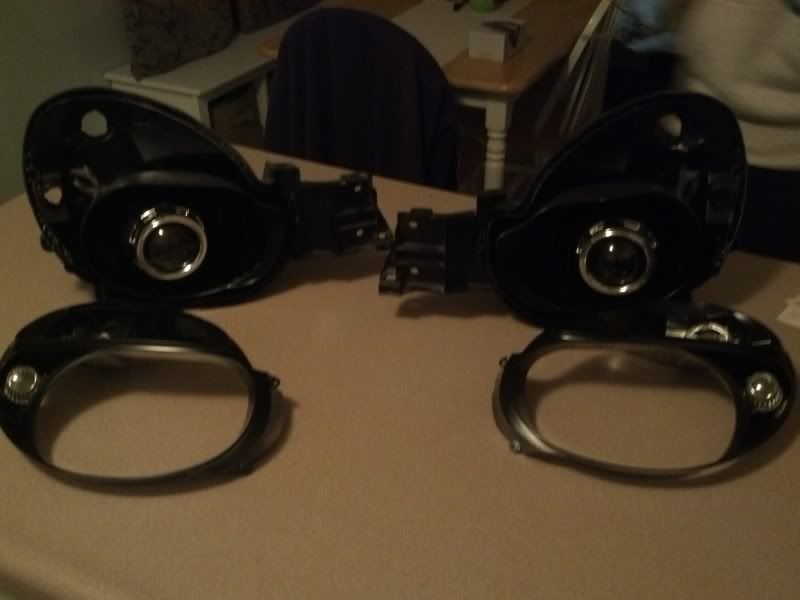
Shrouds:
Once your adapter is cut and ready to go on, you can use your RTV silicone to seal the edges of the back edge of the shroud on the projector. The shroud will rotate on slightly and slide all the way back to the black backing of the projector. This is just added assurance that the projector will stack in place once on the car.
Assembly:
Once everything is dry and ready, grab the small white/clear rubber washer and put it on the back of the projector over the threads, grab your adapter washer and the threaded locking nut. From the front side, slide your projector in, make sure the bi-xenon shield with wires is on the bottom, and patiently thread on the nut. Once started, you'll have to wiggle the projector around a bit as you tighten everything up more and more, once satisfied, use your pliers to tighten further, but not too tight as you may need to adjust it. Now grab the bulb holder and use the 3 tiny screws to put that on.
Example of someone's cut adapter plate:
Go back to your car with your headlight backing, a sharpie, your hid bulb, and the new retaining clip. Clip your hid bulb in to the headlight, connect your ~3 plugs, then slide the headlight on to your car and use 2 10mm bolts to hold it in place. Turn your headlights on, and use a wall to horizontally level your output. Use the sharpie to mark any adjustments you'll need.
Now you can return, tighten down the nut, put a little silicone around the edging of the adapter washer, wipe off the shroud and projector with alcohol swabs, heat up your headlight, put some silicone on the edges, and reseal it. Screw in the 8 screws, pop in all the bulbs, and install back on your car.
Repeat for the 2nd headlight. When finished, use your 8mm to adjust the headlights on the back. You'll want the passenger side slightly higher than the driver side. Make sure your cutoff output is below the side mirrors on a car in front of you, and make sure it is not hitting the rear window if a car is directly in front of you.
It took me a total of 5 hours, a majority of it was baking headlights, waiting for the dremel battery to charge, waiting for paint to dry, and be cautious/patient.
Warning: I am not responsible for any of your mistakes, this is merely a brief guide.
Alright here we go,
Materials:
I ordered the Morimoto Mini H1 with mini gatling shrouds.
Make sure you have a ton of latex gloves for handling everything, and some thicker gloves for pulling out the headlights from the oven.
It would also be beneficial to order some RTV clear silicone, it's about $4. And if you decide to, I strongly suggest painting the reflectors black with Rustoleom Painter's Touch satin black spray paint (2x the coat!).
Lastly and most importantly, you'll need a Dremel with cutting wheels.
Other tools:
8mm wrench for adjusting the leveling at the end
10mm to take off the headlights
various pliers
a thin small flat head and medium flat head for separating the headlights
a medium and small phillips head
a knife to help cut the sealant while separating the headlights
plastic baggies to put bulbs and screws in
Remove headlights:
You'll need to unclip your grill and remove it. Remove a few clips to the bumper so you can pull it back slide your headlight out. There are 3 10mm bolts holding down the headlight. Your pliers will also be useful in disconnecting all of the harnesses.
Disassemble headlights:
Remove all of the bulbs and place in plastic bag. remove the white bracket on the side, 2 phillips screws, then there are 8 black tiny screws on the edges of the headlight, use your small phillips. Use your medium phillips to remove the bulb holder clip. You won't be needing it anymore, so if yours is still in tact you can sell it pretty easily.
Marking up the adapter washer:
This should be done before you bake the headlights so that you can use your dremel to cut up this adapter washer while you wait for your painted reflectors to dry. The Morimoto kit comes with various items, there's a flat washer with a notch on top, that is what you'll be marking up with a washer. You'll need to make the top notch narrower, round the sides at the 3 and 9 o'clock positions, make a notch in the upper left corner at about 10 o'clock, and two round notched at the 4-5 and 7-8 o'clock areas.
Here is one person's example, I would personally cut more so that you have room to play later when adjusting the horizontal leveling:
Baking headlights:
My oven sucks so I preheated it to 250, put in one headlight for 15-20 minutes. Use your small flat head and knife to peel away the lens from the housing, cut at the sealant while you do so, you can use the medium flat head for more leverage if needed. If you are having difficult, put it back in the oven for 5-10 min. Once separated, you can remove the chrome bulb cover piece inside.
Painting headlights:
I just used aluminium foil to mask off everything except the low beam reflector. Make sure the surface is clean. I sprayed one coat, waited 20 min, sprayed another coat, waited 20 min. While you wait for the paint to dry, you can work on modifying the adapter.
Shrouds:
Once your adapter is cut and ready to go on, you can use your RTV silicone to seal the edges of the back edge of the shroud on the projector. The shroud will rotate on slightly and slide all the way back to the black backing of the projector. This is just added assurance that the projector will stack in place once on the car.
Assembly:
Once everything is dry and ready, grab the small white/clear rubber washer and put it on the back of the projector over the threads, grab your adapter washer and the threaded locking nut. From the front side, slide your projector in, make sure the bi-xenon shield with wires is on the bottom, and patiently thread on the nut. Once started, you'll have to wiggle the projector around a bit as you tighten everything up more and more, once satisfied, use your pliers to tighten further, but not too tight as you may need to adjust it. Now grab the bulb holder and use the 3 tiny screws to put that on.
Example of someone's cut adapter plate:
Go back to your car with your headlight backing, a sharpie, your hid bulb, and the new retaining clip. Clip your hid bulb in to the headlight, connect your ~3 plugs, then slide the headlight on to your car and use 2 10mm bolts to hold it in place. Turn your headlights on, and use a wall to horizontally level your output. Use the sharpie to mark any adjustments you'll need.
Now you can return, tighten down the nut, put a little silicone around the edging of the adapter washer, wipe off the shroud and projector with alcohol swabs, heat up your headlight, put some silicone on the edges, and reseal it. Screw in the 8 screws, pop in all the bulbs, and install back on your car.
Repeat for the 2nd headlight. When finished, use your 8mm to adjust the headlights on the back. You'll want the passenger side slightly higher than the driver side. Make sure your cutoff output is below the side mirrors on a car in front of you, and make sure it is not hitting the rear window if a car is directly in front of you.
It took me a total of 5 hours, a majority of it was baking headlights, waiting for the dremel battery to charge, waiting for paint to dry, and be cautious/patient.
Warning: I am not responsible for any of your mistakes, this is merely a brief guide.
01-30-2012 | 01:50 PM
#39
Thread Starter
Registered User
iTrader: (1)
Joined: Apr 2011
Posts: 1,595
From: Next Door
Car Info: 02 PSM Impreza WRX
Thanks for the inputs Jordan, sadly I was kinda lazy to post up all the steps I took and with photos :/. Also it would be very helpful to have an extra set of hands to help.
04-07-2012 | 06:11 PM
#40
Churro Aficionado
iTrader: (38)
Joined: Feb 2008
Posts: 54,642
From: IG - @thomas.teammoist
Car Info: IG - @TEAMMOISTOFFICIAL
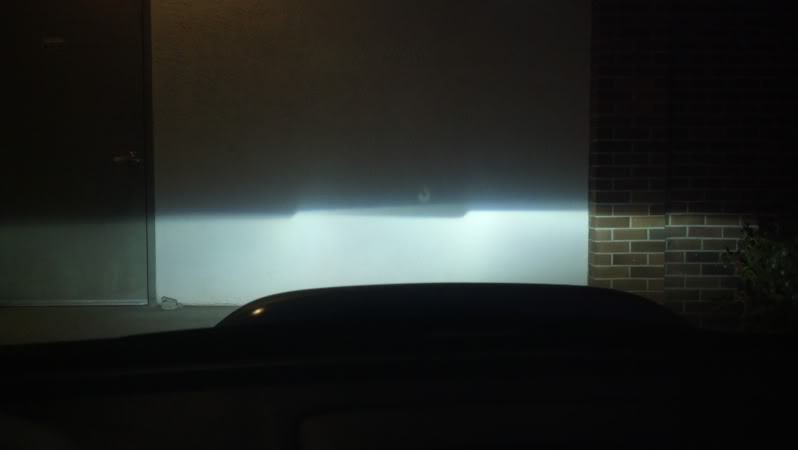
Jordan came over on Friday and we busted out some retro fits for my car 
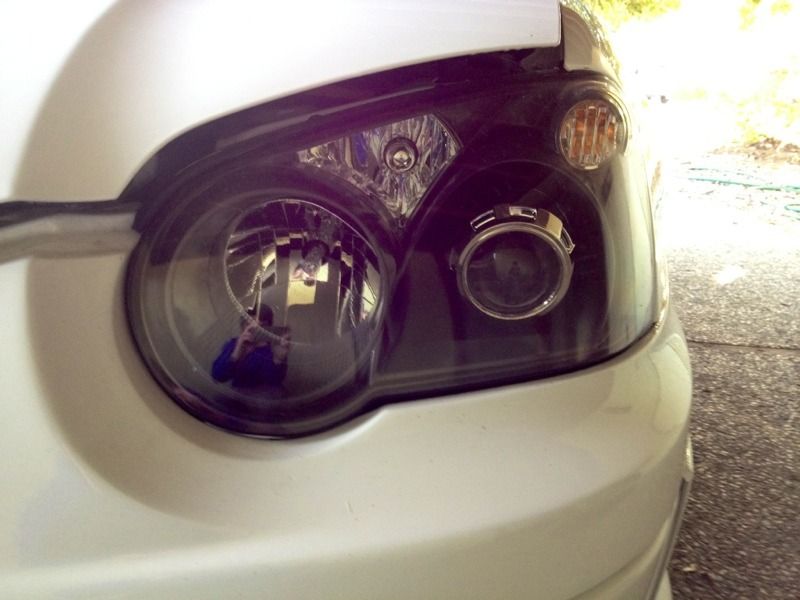
in the middle of things
headlights off

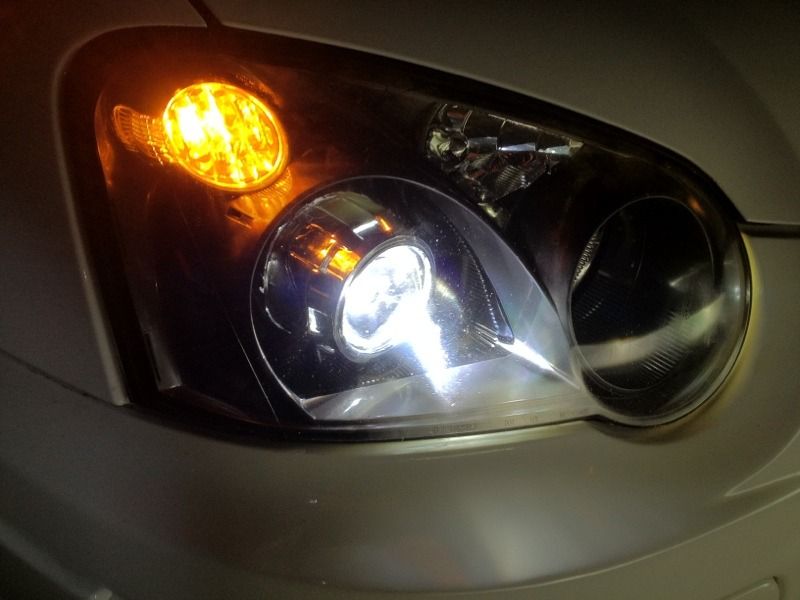
on
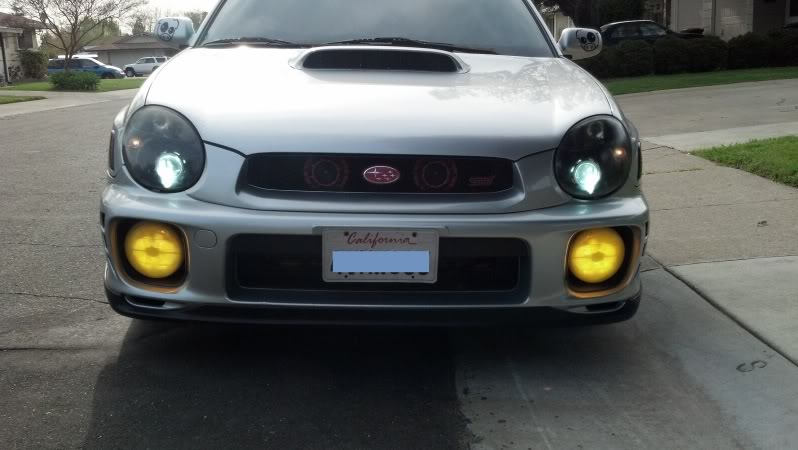
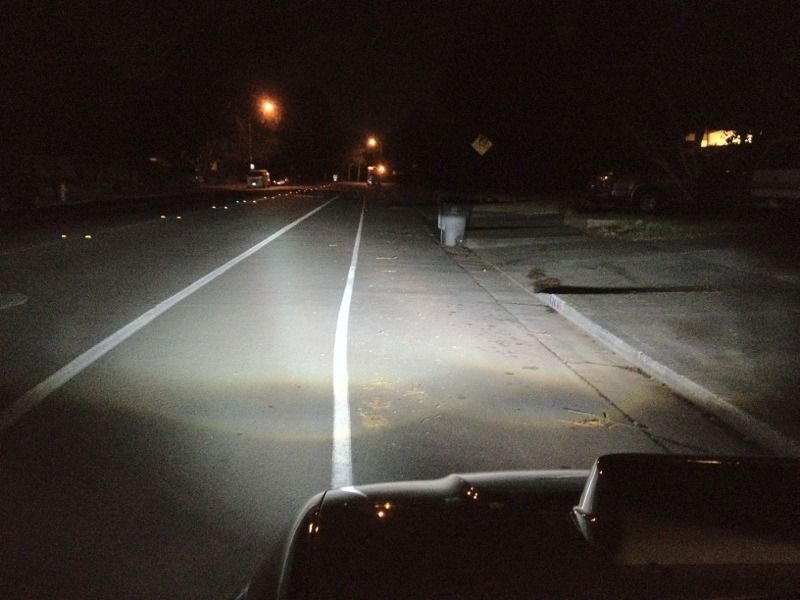
will take some pics tonight as well of the beam pattern
in the middle of things
headlights off
on
will take some pics tonight as well of the beam pattern
04-08-2012 | 11:22 AM
#41
Registered User
iTrader: (2)
Joined: Apr 2008
Posts: 473
From: Sacramento CA
Car Info: 02 wrx love-wagon
yeahh dude! nice! do post pix of beam pattern please, soon.
how is the cutoff? did you get the cut'n'glue projectors or the ones that fit right in with the adapter plate?
i keep putting this mod off due to powerhunger lol
how is the cutoff? did you get the cut'n'glue projectors or the ones that fit right in with the adapter plate?
i keep putting this mod off due to powerhunger lol