
Endura-Tech Hood Damper Kit Review (Pics Inside!)
 04-17-2006, 07:47 AM
#1
Registered User
Thread Starter

Join Date: Feb 2003
Location: Southern New Jersey
Posts: 97
Car Info: 2004 WRB Subaru WRX STi
Endura-Tech Hood Damper Kit Review (Pics Inside!)
Product: Endura-Tech Hood Damper Kit
Application: 2004 Subaru WRX/Impreza GD/GG
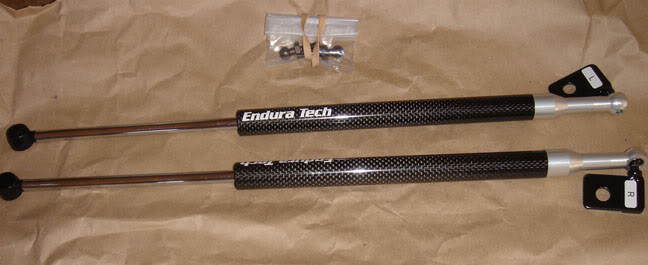
Kit Contents:
- Installation manual
- Bonnet dampers (qty- 2)
- M6 ball joints (qty– 2)
- Stickers (qty- 2)
Installation (as written in the manual):
1. Open the hood and hold with stopper.
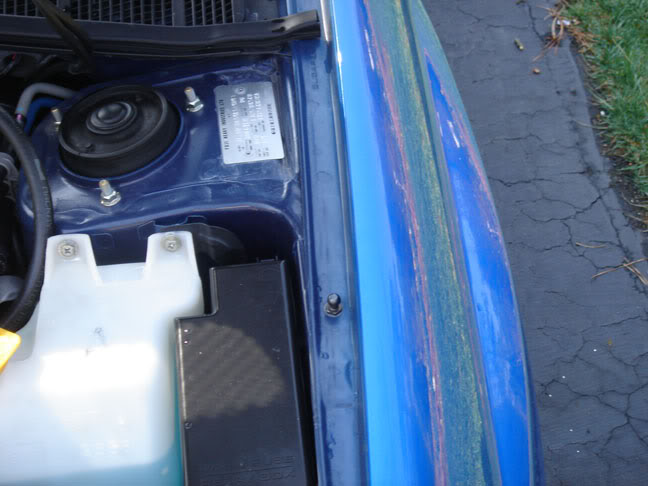
2. Of the three bolts supporting the fender, remove the middle bolt then in its place, screw one of the supplied M6 ball joints. Torque it to 1.0kgf.m (Be cautious use a torque wrench when tightening to specific pressures. You would risk the event of breaking the screws.)
3. Of the hinge bolts, remove the top bolt. Set layered side of the hood damper stay toward the hinge side. Hook top layer on top of hinge and tighten with middle bolt. (There are dampers made specifically for the left and right side. You will want to fit the dampener to the “outer” section of the hinge.) Repeat step on other side.
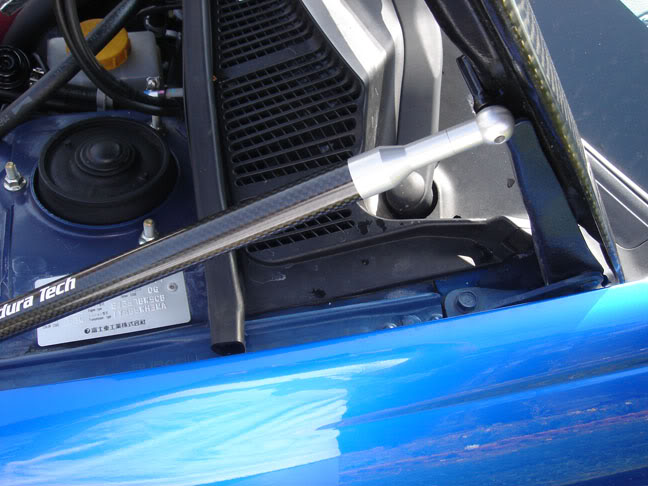
4. Press the socket at the tip of the damper rod onto the ball joint screwed onto fender. (If socket is not facing ball joint, rotate with pliers to turn towards appropriate direction.) Also, check to make sure socket is fully locked in and will not loosen.
5. If left and right ends of the weather strip at the cowl grill stick out at the fenders, cut shaded section indicated in the picture at the right (shaded area of strip will apply unwanted pressure to the damper and cause disfigurement).
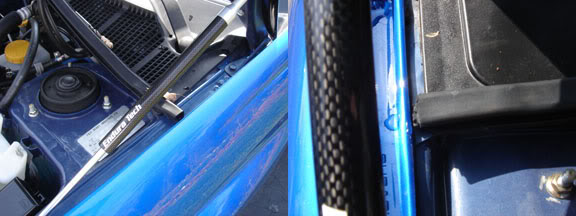
6. Slowly close hood. Check to see if damper is not interfering with hood and the fender. Should they interfere, adjust either height of the stay rubber at the front-side or adjust stay position by loosening its bolt, rearranging position and tightening once placement is set.
Review:
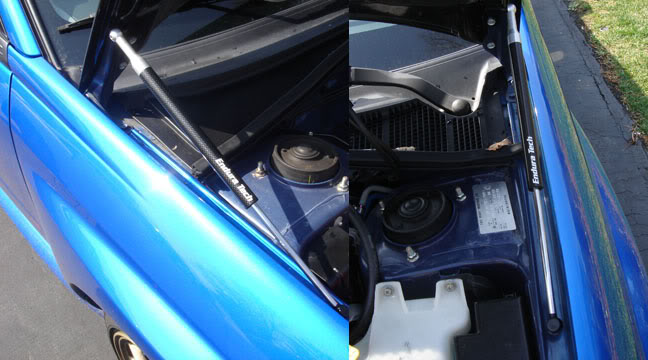
When I first looked at the dampers, I was very impressed by the quality. The carbon fiber weave was straight and even all the way around. The machining of the rods were very nice as well. Overall, the quality is top notch. I have taken a look at other dampers such as REDLINE, TEIN, and NRG, but I could honestly see the difference in workmanship. As for the install, it was a cakewalk. The installation was done in roughly 15 minutes without any hitches. The most trouble I had was to find what size the fender bolt was (which I believe is a 10mm). The instructions were clear, straight forward, and had the answer for any trouble. I didn’t have to do any adjustments with the bonnet stays or the dampers. They just popped in and it was over. As for the open and close action of the dampers, they are very nice. It does its job in holding the weight of a stock and carbon hood and the closing action is good as well. I definitely recommend these dampers if you are tired of that ugly old school kickstand and want to get rid of it since it can sometimes get in the way when you are doing motor work and want to accent and dress that engine bay up with a little carbon fiber. And with that, that’s my two cents.
WRXdrift
Application: 2004 Subaru WRX/Impreza GD/GG
Kit Contents:
- Installation manual
- Bonnet dampers (qty- 2)
- M6 ball joints (qty– 2)
- Stickers (qty- 2)
Installation (as written in the manual):
1. Open the hood and hold with stopper.
2. Of the three bolts supporting the fender, remove the middle bolt then in its place, screw one of the supplied M6 ball joints. Torque it to 1.0kgf.m (Be cautious use a torque wrench when tightening to specific pressures. You would risk the event of breaking the screws.)
3. Of the hinge bolts, remove the top bolt. Set layered side of the hood damper stay toward the hinge side. Hook top layer on top of hinge and tighten with middle bolt. (There are dampers made specifically for the left and right side. You will want to fit the dampener to the “outer” section of the hinge.) Repeat step on other side.
4. Press the socket at the tip of the damper rod onto the ball joint screwed onto fender. (If socket is not facing ball joint, rotate with pliers to turn towards appropriate direction.) Also, check to make sure socket is fully locked in and will not loosen.
5. If left and right ends of the weather strip at the cowl grill stick out at the fenders, cut shaded section indicated in the picture at the right (shaded area of strip will apply unwanted pressure to the damper and cause disfigurement).
6. Slowly close hood. Check to see if damper is not interfering with hood and the fender. Should they interfere, adjust either height of the stay rubber at the front-side or adjust stay position by loosening its bolt, rearranging position and tightening once placement is set.
Review:
When I first looked at the dampers, I was very impressed by the quality. The carbon fiber weave was straight and even all the way around. The machining of the rods were very nice as well. Overall, the quality is top notch. I have taken a look at other dampers such as REDLINE, TEIN, and NRG, but I could honestly see the difference in workmanship. As for the install, it was a cakewalk. The installation was done in roughly 15 minutes without any hitches. The most trouble I had was to find what size the fender bolt was (which I believe is a 10mm). The instructions were clear, straight forward, and had the answer for any trouble. I didn’t have to do any adjustments with the bonnet stays or the dampers. They just popped in and it was over. As for the open and close action of the dampers, they are very nice. It does its job in holding the weight of a stock and carbon hood and the closing action is good as well. I definitely recommend these dampers if you are tired of that ugly old school kickstand and want to get rid of it since it can sometimes get in the way when you are doing motor work and want to accent and dress that engine bay up with a little carbon fiber. And with that, that’s my two cents.
WRXdrift
 04-17-2006, 10:46 AM
#3
Registered User
Thread Starter
Join Date: Feb 2003
Location: Southern New Jersey
Posts: 97
Car Info: 2004 WRB Subaru WRX STi
I don't hve a price for them, but you can get them at an introductory price here:
http://forums.nasioc.com/forums/show...6&page=1&pp=25
http://forums.nasioc.com/forums/show...6&page=1&pp=25


Thread
Thread Starter
Forum
Replies
Last Post
Endura-Tech
Forester General
3
02-20-2008 02:23 PM
Endura-Tech
Interior, Exterior & Lighting
1
02-08-2008 02:20 PM
My_Red_Suby
Suspension, Handling, and Brakes
4
10-09-2004 01:03 AM